The Fogue Abode: July 2016

Friday, July 29, 2016

Fogue Faves - July 206

This post DOES NOT contain sponsored or affiliated links.  All opinions are 100% my own.
 
Holy Cow!  How are we already at the end of July?  I tell you these months just fly by.  It seems like yesterday we were starting our very first Fogue Faves and here we are back for round 2.  (Ding, Ding) there's the bell so lets get started.


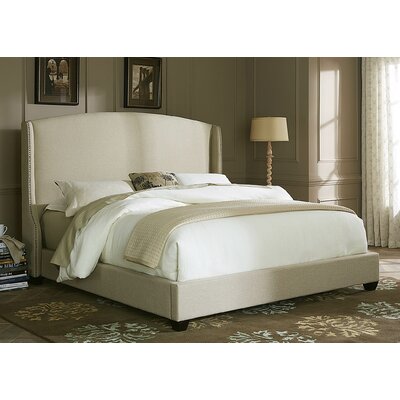
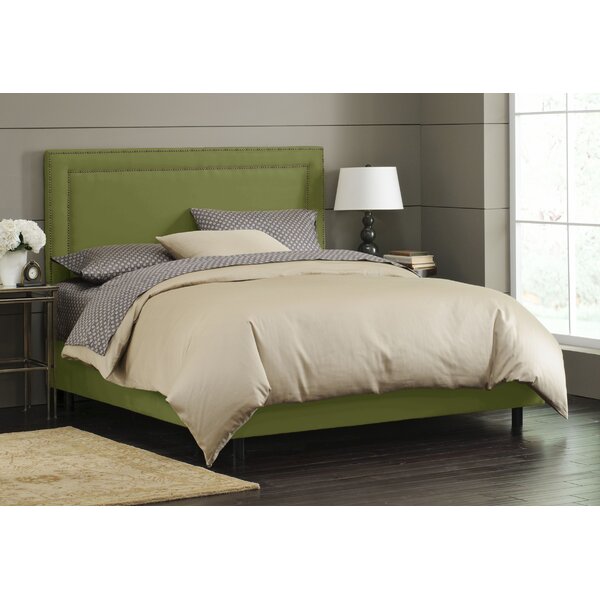
I've really been thinking hard on our master bedroom revitalization.  To start, I need to find the perfect bed.  Here are a couple that I am really digging.
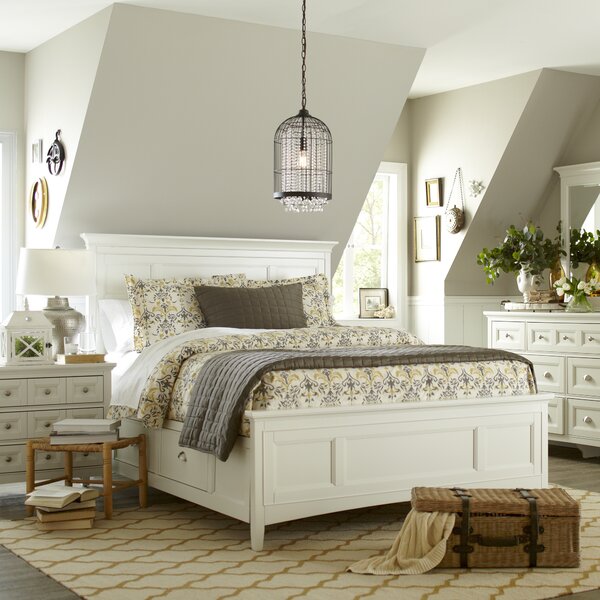
Tilton Panel Bed by Birch Lane


Dellinger Upholstered Plateform Bed


Premeir Panel Bed


This kitchen speaks major motivational thoughts to my DIY brain.  Holli over at BeesnBurlap has a stellar kitchen layout.  Her remodel is just screaming that I need a white porcelain sink and those lights.  All the heart eyes.


Thanks to great hashies like #onthejunkintrail over on instagram, I'm able to find some great and unique vintage inspiration.  One can find all sorts of neat junk to add to their next market trip list.  This month I am needing a vintage bicycle in my life, stat! 

Created by Benjamin Bullins and featured on Suzik.


One word, Netflix!  During the summer months, when not much of anything is on tv, I binge watch Netflix.  I have found a couple of really great series that I'm loving!  If you are looking for something to watch check these shows out!

IMDB
 
IMDB

IMDB


Finally, I caught up with the Mr to see what he's digging this month.  Turns out he really really likes having the Husqvarna Backpack Blower we got a few months ago.  It came in very handy while cleaning up the storm debris from the night the lights went out.  Man-toys!


That's going to wrap up the July Fogue Faves.  Hope we were of some inspiration to you. 
 
What's your July favorite?

Wednesday, July 27, 2016

{August} Meal Plan

Last month, I detailed my meal planning process with the post Meal Planning 101.  I received a ton of feedback and encouragement from my meal planning methods.  So, I figured I would take it one step further and give you our monthly meal plan each month.  You know for inspiration and all!

Now, this is in no way "budget-friendly"  but I can tell you I spend around $400 a month on groceries which isn't bad.  It's also not "health-conscious" although I do try to add in fresh vegetables here and there.  This is just simply a list of food my family enjoys.  We are carbie Mexican obsessed carnivores!  But it sure is a yummy life.  

At the end of the post, I will link as many recipe's as I can.  I'm going to go with the assumption that you know how to make a basic burger or quesadilla. 

If you want more info on how to plan your own monthly meal plan, please refer back to this post.

Below you can download the August menu and I have included a few of the recipes.  Happy meal planning!

>>August Menu<<

Creamy Noodles with Ham
Italian Sausage and Pasta
Sunday Chicken
Ham & Cheese Foldover
Malboro Man Sandwich
Bacon Gravy
Vegetable Beef Soup
Taco Pie - I like to mix black beans with my meat mixture
Mexican Meatloaf
Cheesy Chicken & Potatoes
Chicken Parm. Casserole
Beef Enchiladas


Monday, July 25, 2016

Room x Room House Tour {Master Disaster}

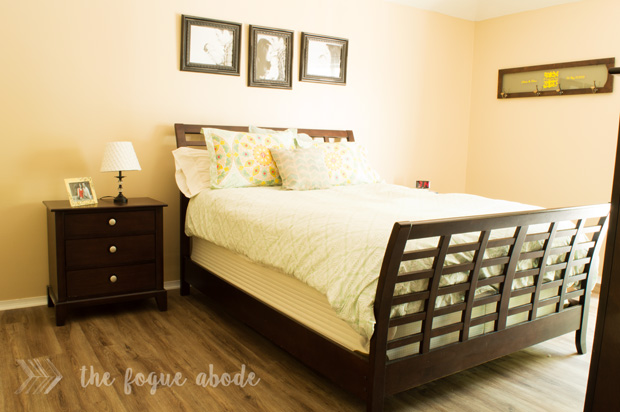
Welcome back to our room x room house tour.  If you remember back to Friday, I discussed how I would be going room by room as we put everything back together from our flooring installation.  Today, I wanted to show off our not-so-impressive master bedroom.  Regretfully, this is the one room we really haven't touched since we moved in two and a half years ago.  I really haven't had that "ah-ha" moment with the direction I want to take our room. 


The plan is to upgrade to a newer King bed with some kind of night stand/table on each side that matches instead of this miss-match thing we have going on now.  The side lamp was a quick grab from Walmart because I needed something for middle of the night feedings when Aspen was just a baby. 


The curtains covering the window are actually still up from what the previous owners left and the opposite wall just has the dresser and a tv.

We really need to focus on adding more furniture, selecting a paint color besides this beigey color and updating the lighting. 

I guess the one thing I am totally loving in this room is our new floor.  We certainly need to bump this room up in priority ASAP!

Friday, July 22, 2016

Room x Room House Tour {Living Room} + Flooring Reveal

I have some great news, we finally got our flooring finished! I'm just over here doing my happy dance!


If you'll remember back in May when we had our not so little water leak?  Two months later, a lot of debate over flooring, and 2 additional weeks of contractors, the flooring is finished.  I think it looks great! 

So what did we end up going with?  We decided to go with a vinyl snap in plank.  It has the look and the installation like a natural wood floor except water won't damage it.  With 2 dogs and little ones running wild, we both figured that was the smartest idea.  Even though I so wanted real hardwood.  Oh well, something to dream about.  Instead of sugar plums dancing in my head, it will be cherry oak hard wood panels. 

The flooring is from DaZignCore in Dune which we got through our local hardware store.  It's a beautiful wood color with hints of gray making it look weathered.  I was really worried it would be to gray with our walls, but it looks fabulous. 


So, now that flooring is done, we can start putting our house back together.  Two months of a disaster area has my anxiety through the roof.  It feels really good putting the rooms back together.  And with a toddler running rampant like a little Tasmanian devil leaving a path of destruction in her wake,  I figured now is a great time to get those updated room pictures out to you guys.  It's going to be a slow process so I will probably do it room by room.  Today I am starting out with our formal living room. 

So when our house was built, this was the only living room.  It wasn't until later that the former owners decided to close in the garage to create the larger family room.  Now we use this space for mommy (that's me) to be creative and have something pretty. 


I love how the piano is coming together.  It took a little while and some collecting of junk, but it's starting to look put together.  I kept Aspen's birthday pictures up (did you catch that opps....Major reveal you better call TMZ stat) they are just so darn cute.  Next on the to do list is giving this piano a coat of paint.  I'm still trying to decide what color that would be.  I'm feeling a real light teal.


Over the years I have collected lanterns, they fit so perfect in the fireplace to fill that empty place.

You see the little bird cage on the right?  It was actually from our wedding.  I am a hoarder of cards, I just can't let that sentiment go, so we collect them in this bird cage.  Birthdays, Anniversaries, Valentines, you name it we keep it.  It's actually fun to go through and see the fun little notes we wrote each other. 


Well that rounds up the front living room.  Make sure to tune in next week for more tour fun. 

Source List

Paint Color - Sherwin Williams Dorian
Flooring - DaZignCore Dune
Chairs - Lamps Plus Flynn Upholstered Armchair
Ottoman - The Painted Tree
Décor - Hobby Lobby, Home Goods, Flea Markets

Monday, July 18, 2016

That's the night that the lights went out...

Boy has the last four days been a whirl wind, and quiet literally. 

Thursday evening, I got home from work just in time for this massive storm to roll through.  I had just walked into the door when the wind went crazy.  It was a scary little situation.  Our back yard is full of trees, trees that we hope to get cut down soon.  We could hear the trees snapping and popping.  So I grabbed A and we headed for the closet. 

Trees falling on my house is a real fear of mine.


We were in the closet for a good 20 minutes listening to the wind howl and junk hitting our roof.  The lights were real quick to go out.  Thank goodness for smartphones.  We had a few YouTube videos to keep A calm and entertained.

When we emerged from our little hiding cocoon, we found trees, huge limbs and power lines down everywhere on our road.  This is a photo looking out our drive way with leaves littering it.


Thankfully, our little house survived the first natural disaster we have experienced in it.  Apparently the storm system brought straight line winds that knocked power out to over 130,000 people in our state. 

With the electricity out for what was going to be days and with the July Arkansas heat, we decided to pack up our camper and head somewhere that we could plug in at.  Thus leading to our little lake adventures this past weekend.


Thankfully for some awesome linemen, our power was restored just as we were pulling back home Sunday afternoon.

A enjoying Sunday evening playing outside as we unpacked.
   

Friday, July 15, 2016

A Mid-Summer Vintage Wedding Shower

Back again with another scoop on another awesome shower.  This time we were showering newly weds.  I got to break away from all the cutsey-wutsey baby stuff and be a big girl for the day.

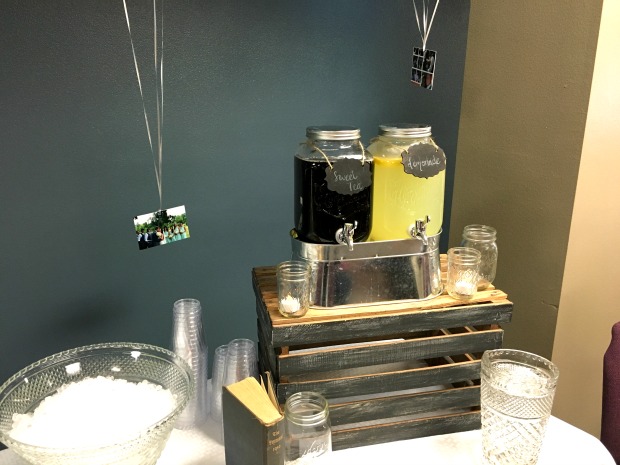
The shower didn't totally have a theme, I guess you could say vintage summer.  I wanted to use some of the older pieces I had collected while still sticking with their mint and grey wedding colors.   Since we are right in the midst of summer, I loved having a more southern and summery affair. 


With that in mind, we chose to do pie in jars, lemonade and sweet tea and cheeseburger sliders instead of the more traditional shower food. 


For the backdrop to the table, a friend of mine did an awesome job hanging pictures of the couple from balloons using mint and pearl white balloons.  We used some duct tape to keep them relatively in place.  I love the effect of the hanging pictures.


Wednesday, July 13, 2016

How To Build An Industrial Style Shelf

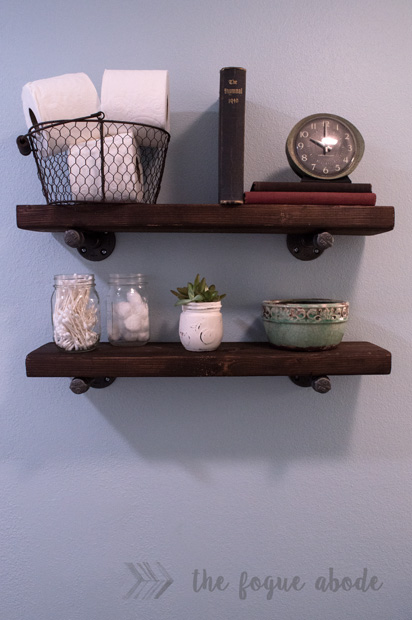
I have been wanting an industrial shelf in my home for quiet some time.  I love the rugged look it gives especially when you put it in a soft and airy room.  After I installed the towel hangers,  I thought the bathroom could use another industrial piece. 

Light Bulb!  I could install an industrial shelf above the toilet.  It would be the perfect spot for one!  I was so excited that I ran to my local hardware store for some pipe fittings.


The project was super easy, anyone could install it.  It would be a great addition to any bathroom, kitchen or dinning room.

So here is the step-by-step guide on how I installed my shelf.

Our cast of characters include 2 pieces of lumber, I used a 2x6, 4 pipe flanges, 4 6" pipe nipples, and 4 pipe caps.  You also will need a drill, heavy duty anchors and screws.


First I took my 2 pieces of lumber and I stained them. 


Make sure to wear gloves when you stain wood, it's a mess you don't want to clean up.  Trust me on this one!


I had originally thought I would screw the pipe flanges into studs to help anchor it down.  But once I got home, I discovered that the flanges were so wide that they straddled the studs.  I had to resort to plan B and ran and got some heavy duty anchors.


Following the anchor directions, I marked the flange holes and drilled 1/4" holes.  I then screwed in the anchors and was ready to fasten the pipe flange to the wall.


 Once that's done, you just screw in the pipe nipple and pipe cap.  Repeat steps on the other end for your second bracket.


Now your ready to place your piece of lumber on top of the brackets and shelf is complete.


To style the shelves, I added a couple of bathroom essentials like q-tips, cotton balls and toilet paper.  And a few non-essentials, books and clocks are perfect on any shelf as is the succulent and candle.  Wait, that candle may be an essential after all.


 What do you think of the industrial shelf craze?  Do you NEED one of  your very own?  Help us get the word out on this super simple how-to project by pinning the image below. 


Monday, July 11, 2016

DIY Bathroom Towel Holders {Industrial Style}

Remember that super long blank wall in the bathroom?  Well, I've been racking my brain for a fun idea for that wall for 6 long months.  With all the white and light colors, I really wanted something to contrast that.  I also wanted to add some industrial elements to the room. 


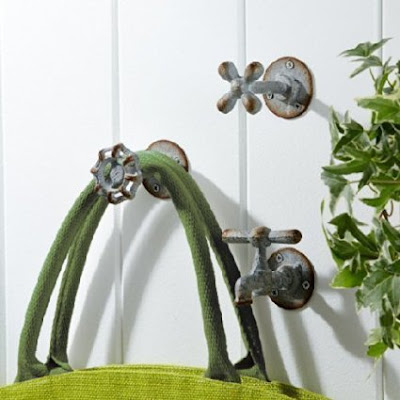
When we had our trip to the lake back in April, I was drawn to the different water valves I ventured across.  I thought using a couple of different valves as towel holders would be just the industrial element we needed for that wall. 


I found this on Amazon and used some scrap boards laying around the garage to install them to.  I purposely picked out the imperfect and odd sized boards just to give it some character.  Plus, it's easier to hid screw ups when you intend for them to be different, right?


I stained the wood a dark chestnut brown using a Rustoleum stain, drilled holes for the screws and screwed each valve onto the board.  I used simple brackets nailed to the back to hang them by.


Project Total came to $27.


Newer Posts Older Posts Home